How to create a PneuFlex actuator
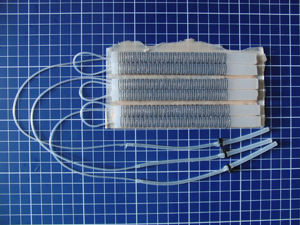
This guide teaches you how to build your own PneuFlex actuator. The use of soft materials such as rubber and air give them special abilities that make them different to traditional electromechanic actuators built from motors, gears, tendons, joints and links. Those typical mechanisms are prone to wear, require many parts, and are difficult to assemble. This makes capable robots quite expensive and unaffordable to most interested people. It also stiffles innovation, as post hoc changes are very costly.
Contrary to this, the PneuFlex actuators utilize properties of continuous matter and its clever arrangement to create controllable deformation. As rubbers are manufactured by molding, it is easy to mass-produce them cheaply once a practical form is found. But for the researcher or hobbyist, it is more important that they are easy to produce yourself with few specialized equipment, making them customizable. It is also very easy to repair PneuFlex actuators with silicone adhesive. Additionally they are also exceptionally robust against blunt collisions, and impervious to dust and liquids. The actuators bend by inflating them with compressed air. We operate ours with up to 50-400kPa (0.5-4 bar) of pressure, depending on geometry and rubber used.
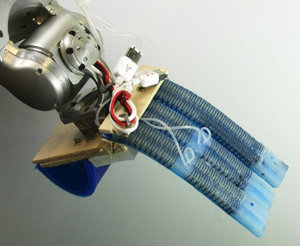
What can you use them for? Well, that’s up to you. We use them to make fingers for robotic hands!
Video tutorial
Bitte beachten Sie: Sobald Sie sich das Video ansehen, werden Informationen darüber an YouTube/Google übermittelt. Weitere Informationen dazu finden Sie unter Google Privacy.
1 Tools and Parts
1.1 Silicone rubber
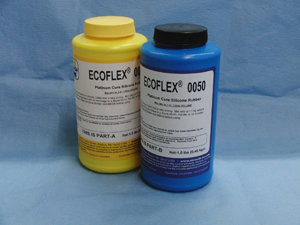
The most important ingredient of the PneuFlex actuator is the rubber used. These are so called Room Temperature Vulcanising (RTV) addition-cure rubbers, which usually are provided by manufacturers as two separate, honey-like parts. Once mixed, they cure at room temperature within a few hours to form solid rubber.
We regularly use the EcoFlex and DragonSkin products from Smooth-On, but you can also use other manufacturers. Just make sure the Young’s modulus is comparable (70-300 kPa), and the rubber can stretch to at least 4-5 times its initial length before ripping.
A few tips for processing addition-cure silicones: they degrade over time, so only buy small quantities, and store them cool and tightly sealed. Silicones are easy to handle materials, nevertheless check the manufacturer’s safety sheets for handling precautions. Addition-cure Silicone is also very susceptible to traces of e.g. sulfur (latex gloves!) and uncured epoxy resins (molds!) and then will not cure properly (i.e. form a tacky surface).
The final strength of the rubber is reached only after several days. To speed up this process, one can put the silicone into an oven at 60°C for two hours.
1.2 Fiber reinforcement
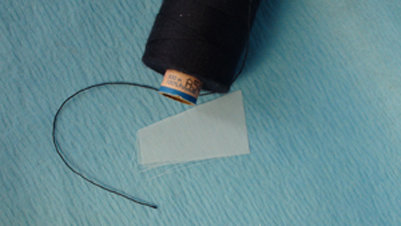
The actuators embed fibers to suppress the strain of the rubbers in certain direction. We found that the best and most available material is poly ethylene terephtalate (PET plastic, often called “Polyester”). We use common sewing thread (50 gauge) and monofilament polyester screen, also called silkscreen fabric (43 threads per inch). Both are made of PET. Alternatively, you also can replace the silkscreen with felt or other thinly woven fabrics.
1.3 Silicone rubber tubes
To actually be able to pump air into an actuator, one needs to connect it to an air supply or valve. Industry has settled on 4mm Polyethylene (PE) tubes system for pneumatic control, so this is the likely interface you need to connect to. But PE does not bond to silicone, so simply sticking a PE tube into the actuator won’t work. We solve this by using silicone tubes with 1.5mm outer diameter, which we simply insert in the cured silicone with a a big perfusion cannula (2mm inner diameter).
1.4 Molds
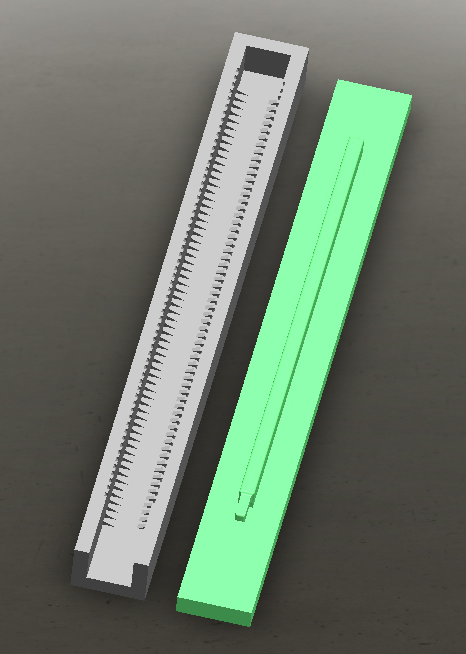
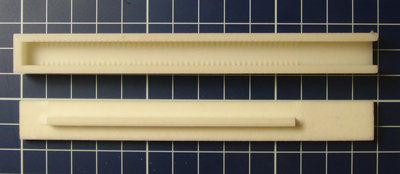
For a simple version of a PneuFlex actuator, the mold could be created manually, but 3D-printing is getting inexpensive enough to be readily accessible. Operating on CAD models also enables the easy customization of geometry. Our print shop provides us with molds made of epoxy-infiltrated plaster, but you can also use printers based on other technologies, e.g. ABS polymer.
Here are the links to two CAD models in STL format for printing:
Model 5 (shown in this tutorial): small size (9mm), recommended silicone: DragonSkin 20 (E=300kPa)
Model 7 (shown in the tutorial video) : bigger size (18mm), recommended silicone: DragonSkin 10 (E=150kPa)
We have also published the more recent version of the PneuFlex CAD models.
1.5 Vacuum pump & Vacuum chamber
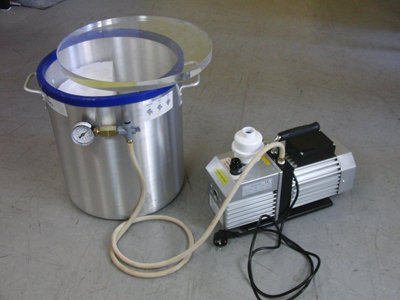
The only specialized equipment you’ll need is a vacuum pump and a vacuum chamber. Thoroughly mixed pre-cure silicone contains many air bubbles. If they are not removed, they weaken the rubber’s ultimate tensile strength, and also create weak spots. Even more important, we use it during casting to avoid trapped air bubbles.
As uncured silicone is quite viscous, we need a good vacuum of about 5-10 kPa (50-100mbar). You may find suitable setups in certain labs (chemistry, mechanics) of universities. You can get suitable vacuum pumps for as low as 100$, and chambers for as low as 150$. A cheaper alternative to vacuum chambers are lab (vacuum) desiccators made of glass.
1.6 Shopping List
If you want to quickly start your own PneuFlex actuator factory, and don’t care about costs, here’s the list of things we know that work:
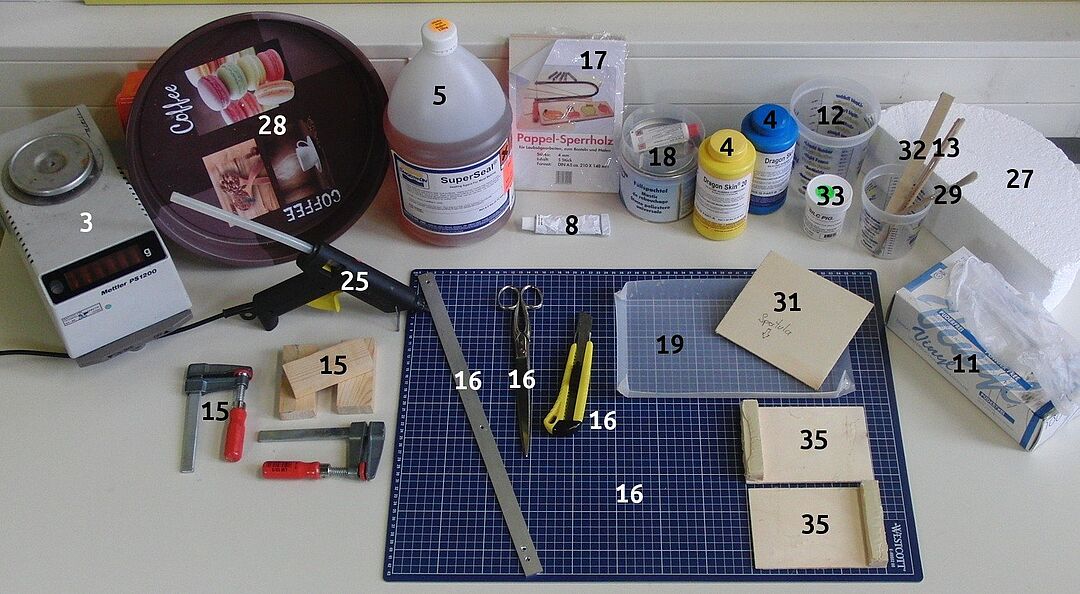
- [1] Vacuum chamber
- [2] Vacuum pump (or here)
- [3] Gram scale
1.7 Shoppping List Consumables
And here is the list of consumables you need:
- [4] Silicone DragonSkin 10 or 20 (ca. 150 and 300kPa Young’s modulus respectively)
- [5] Mold sealant
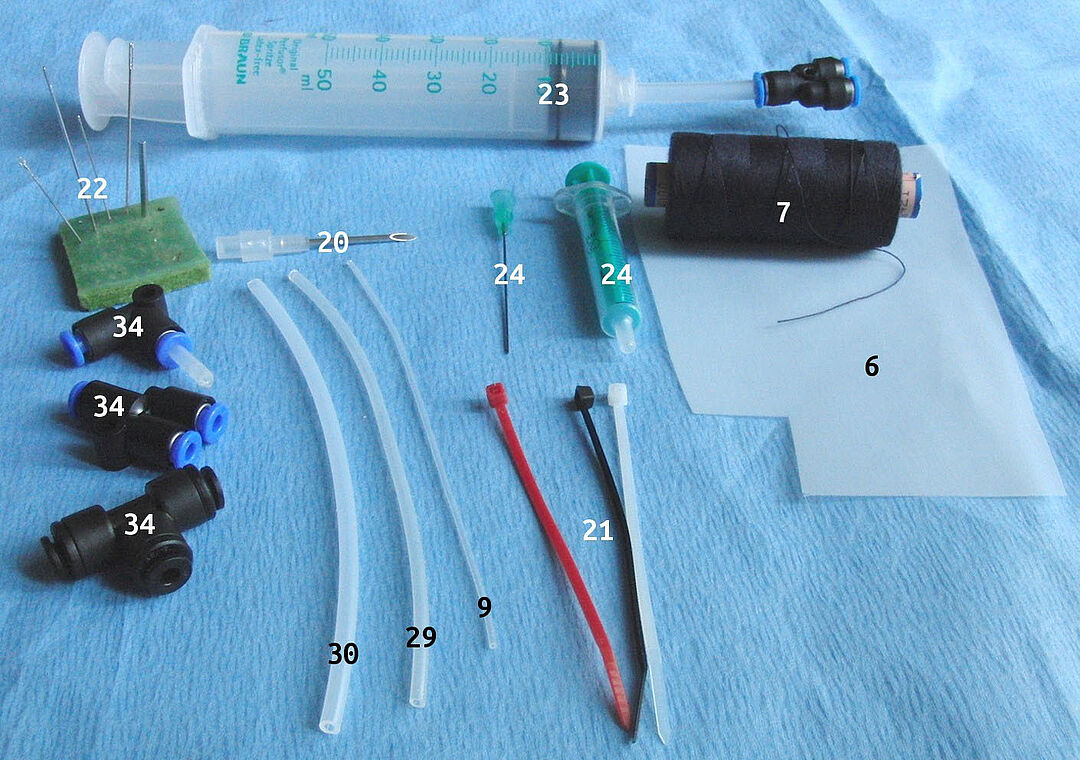
- [6] Silkscreen
- [7] Sewing thread
- [8] Adhesive
- [9] Silicone tubes 0.5mm ID, 1.5mm OD
- [10] Adapters for silicone tubing
- [14] Mold release agent (making it easier to unmold and not break the mold)
- [29] Silicone tube, 2mm inner, 4mm outer diameter (for connecting to PE tubes)
- [30] 4mm PE pneumatic tubes (for connecting to industrial pneumatics)
- [33] Color pigments for silicone
1.8 Various helpful tools
Here’s a non-exhaustive list of things we have found to be practical for handling and producing PneuFlex actuators. You can usually find them in hardware stores / home depot, art stores, and pharmacies.
- [11] Vinyl gloves (for handling liquid silicones)
- [12] big Polyethylene/Polypropylene cups (for mixing silicones)
- [13] chopsticks (for mixing small amounts of silicone)
- [15] clamps and wooden blocks for assembling casting setups and fixing molds
- [16] cutter, scissors, metal ruler, cutting mat
- [17] 3mm soft plywood for making spatulas, funnels and general prototyping
- [18] Fiberglass polyester resin (used in car repair) for sculpting and general prototyping
- [20] Aspiration cannula 2mm inner diameter (for inserting supply tubes into actuator)
- [21] small cable straps (to secure rubber tubes)
- [22] Sewing needles (to fix/add reinforcements, stuff glue into gaps, nudging threads)
- [23] 50ml syringe (for demonstrating/checking rubber actuators)
- [24] 1-2ml syringes and ca. 0.9 mm inner diameter cannulae (for fixing actuators)
- [25] Hot glue gun
- [27] Polystyrene blocks to fill vacuum chamber (speeds up evacuation)
- [28] metal pan fitting into the vacuum chamber (easier to clean spills)
- [29] brush (for applying sealant)
- [34] connectors for 4mm tubes
1.9 Built tools
Here’s a list of tools we built to accommodate for certain tasks:
- [19] Polypropylene/Polyethylene sheet pan (for casting sheets of rubber) (0.8mm)
- [35] funnel for molds, made of plywood plates, wood bar, and polyester resin
- [31] broad spatula (with two spacers) to create evenly thick sheets of silicone, made of plywood
- [32] narrow spatula (plywood) for mixing and applying silicone
2 Production of Silicone parts
The following procedure is universal to casting silicone parts. It works for molds with moderately small cross section (>3mm width). We will describe the steps with the mold for creating the active layer of the rubber stick actuator.
2.1 Create and prepare molds
Depending on the material the mold is made of, it must be prepared before use.
For porous materials like plaster, use a sealing agent. We use Super Seal from Smooth-On, but other people report success using acrylic spray. If your mold material is smooth and solid (e.g. PE or Nylon), you can skip this step
To aid the release of the cast, you can apply a so called release agent to the mold prior to each casting. Again, you may do it without if your mold is tough or flexible enough. It is mandatory though, if you use silicone as mold material.
2.2 Setup molds
Assemble the parts of each mold, and fixate them with clamps. All openings should point upward.
To be able to pour the silicone into the molds, you need to fit a funnel on top of them. You can be creative here as long as the funnel forms about 3-5x the volume of the mold. We use two wooden L-shaped plates, so we can adjust the width to the number of molds. The breadth was adjusted with some fiberglass polyester resin, so there is no gap.
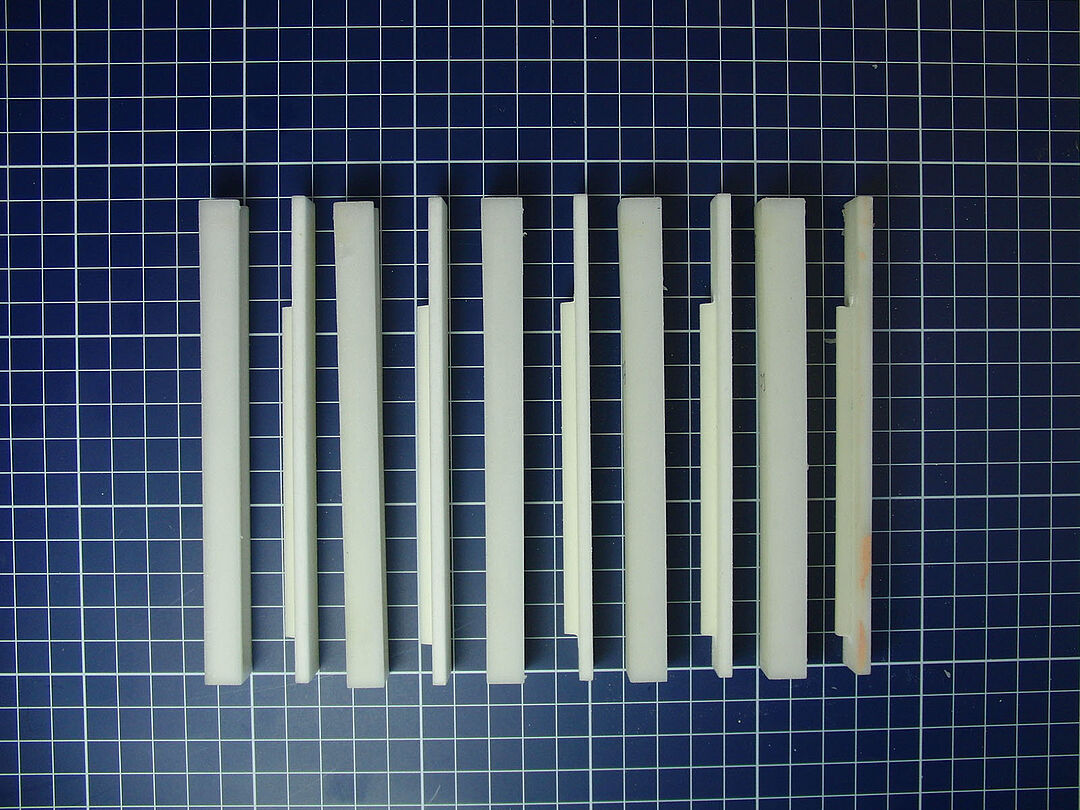
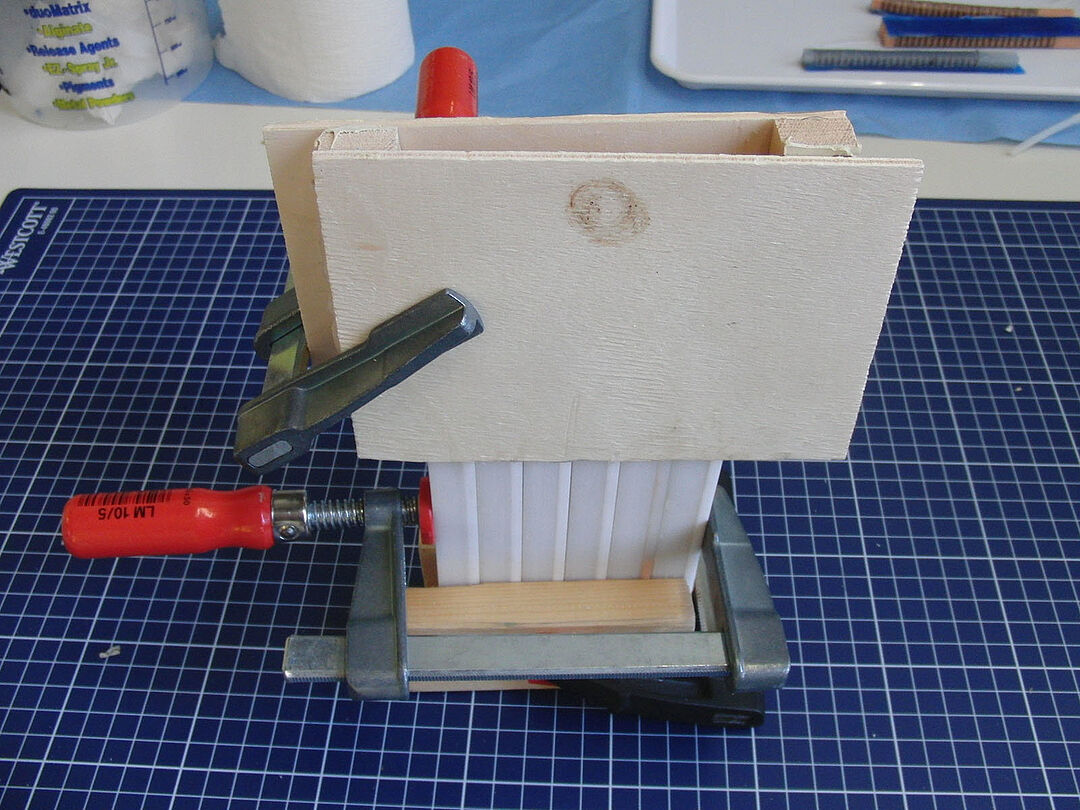
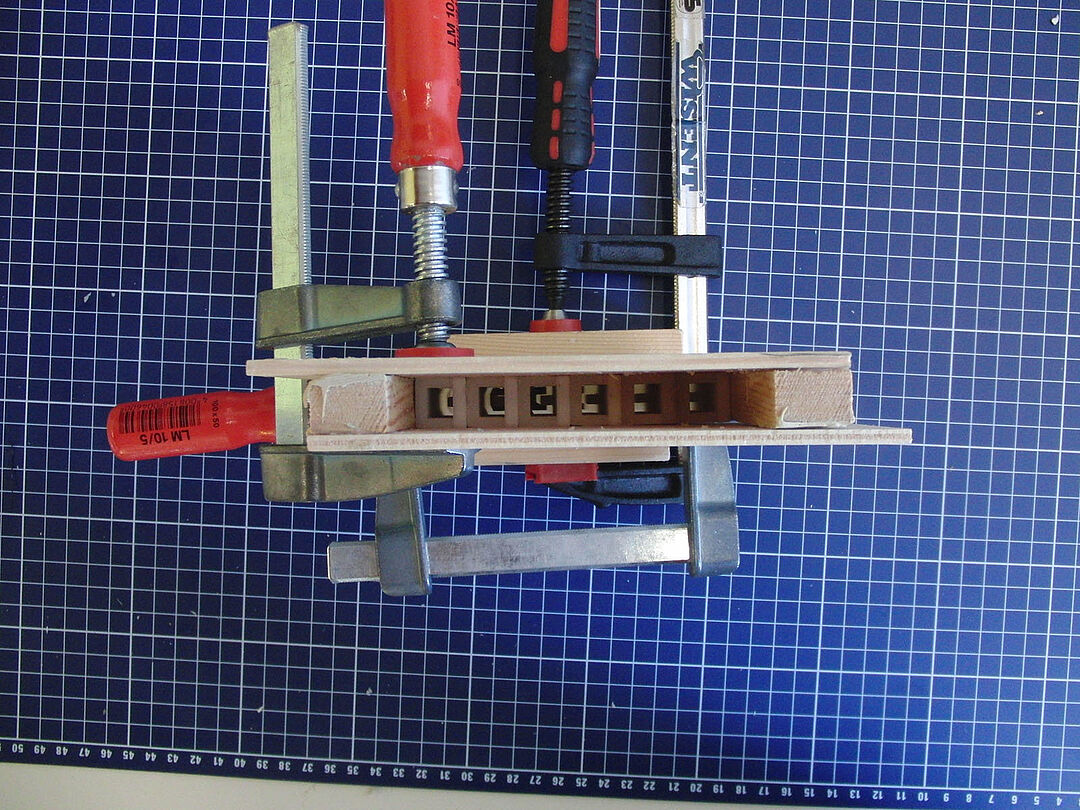
Figure 8: Mold assembly
2.3 Measure and mix silicone
Each mold needs about 10ccm silicone. Add about 10-20g for losses during handling. The density of silicone is similar to water (1.07g/cm³). Measure the amount of both components with a gram scale into a mixing cup that is at least 4 times as big. Mix vigorously (e.g. with a chopstick, or a narrow piece of plywood), and scrape off the walls and bottom several times to make sure the parts mix thoroughly.
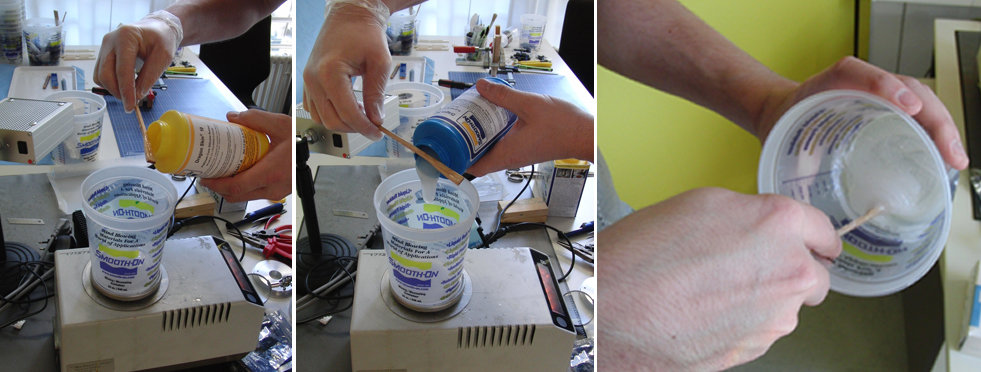
Figure 9 Mixing Silicone
2.4 Degas silicone
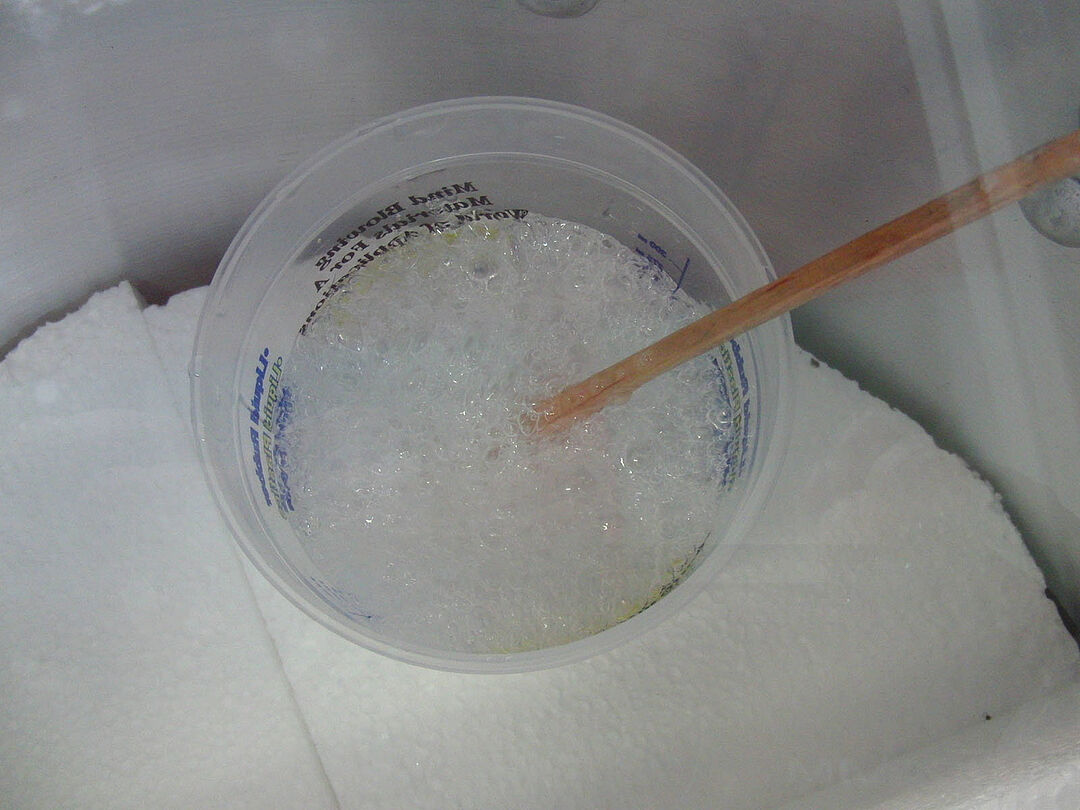
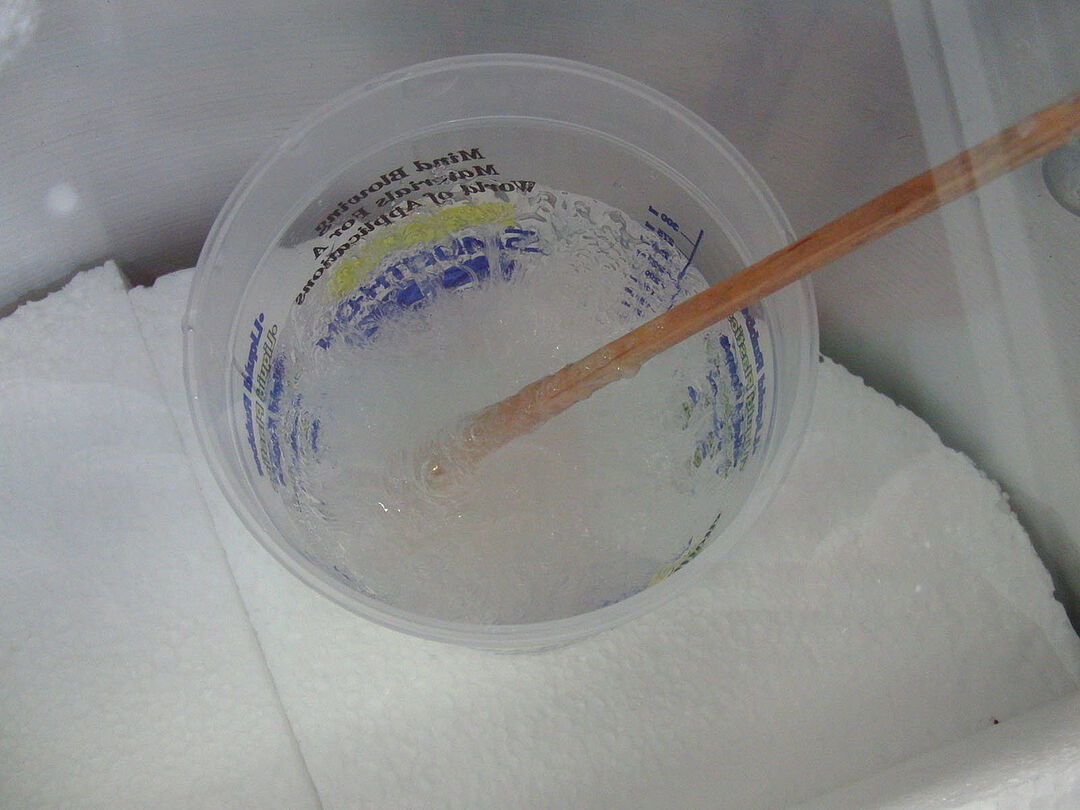
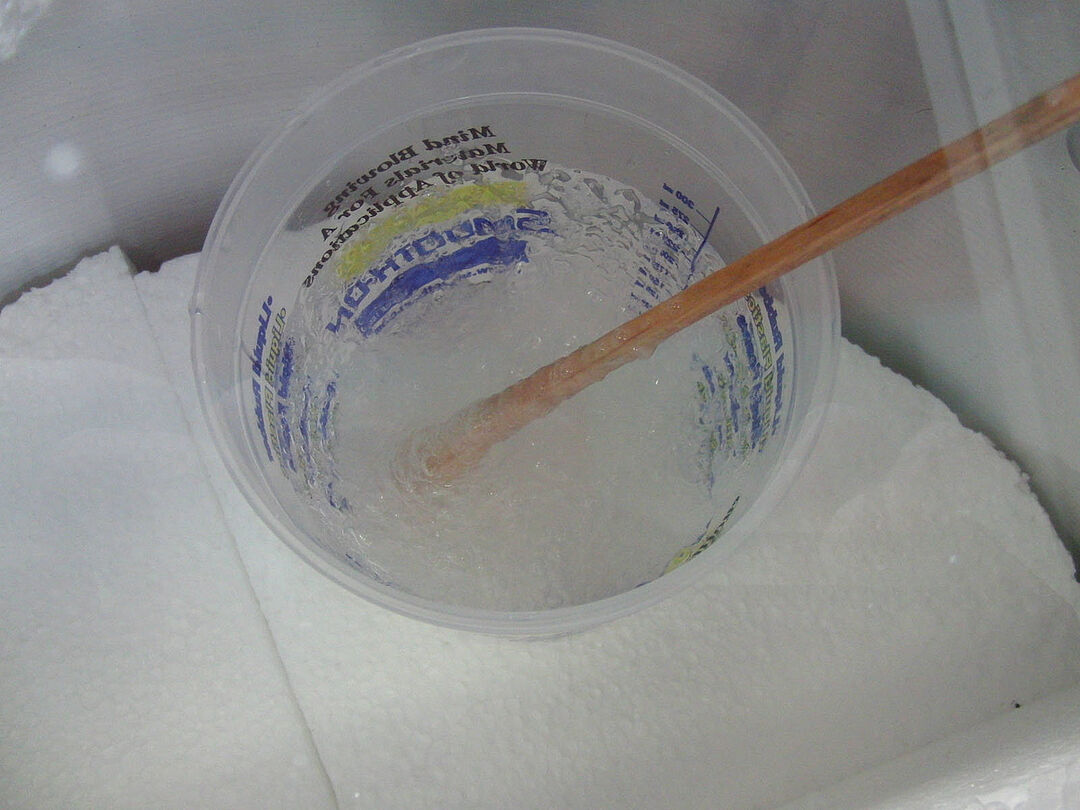
Put the cup with the mixed silicone into a vacuum chamber or lab desiccator, and evacuate. The air trapped in the silicone will expand and bubble out. Depending on the strength of your vacuum pump and the viscosity of the silicone, this can take up to ten minutes. Pressurize after most bubbles are gone.
 © RBO
© RBO
 © RBO
© RBO
 © RBO
© RBO
Figure 11: Stages of degassing. First, the silicone foams up to 3-5x its initial volume (from 60ccm to 275ccm in this example). When reaching a critical pressure, most bubbles collapse quickly within about 10-15 seconds.
2.5 Fill mold
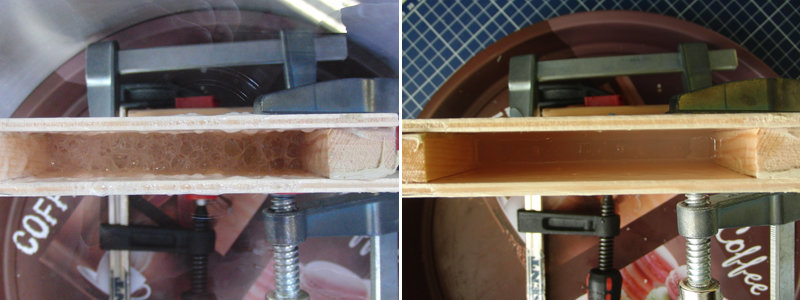
Pour the degassed silicone into the funnel on top of your assembled molds. Return the whole assembly to the vacuum chamber and evacuate again. This removes the air from the mold, and lets the silicone flow into it.
Again, wait until no more bubbles leave the mold. Usually you can leave everything in the chamber until the silicone starts to set. If you experience troubles with trapped air, you can cycle between minimum pressure and 200-400mbar to aid pushing the bubbles out and flowing the silicone into the mold.

2.6Cure
The silicone is cured at room temperature overnight. This process can be sped up by putting the mold into an oven at 60°C for 2h.
2.7 Unmold
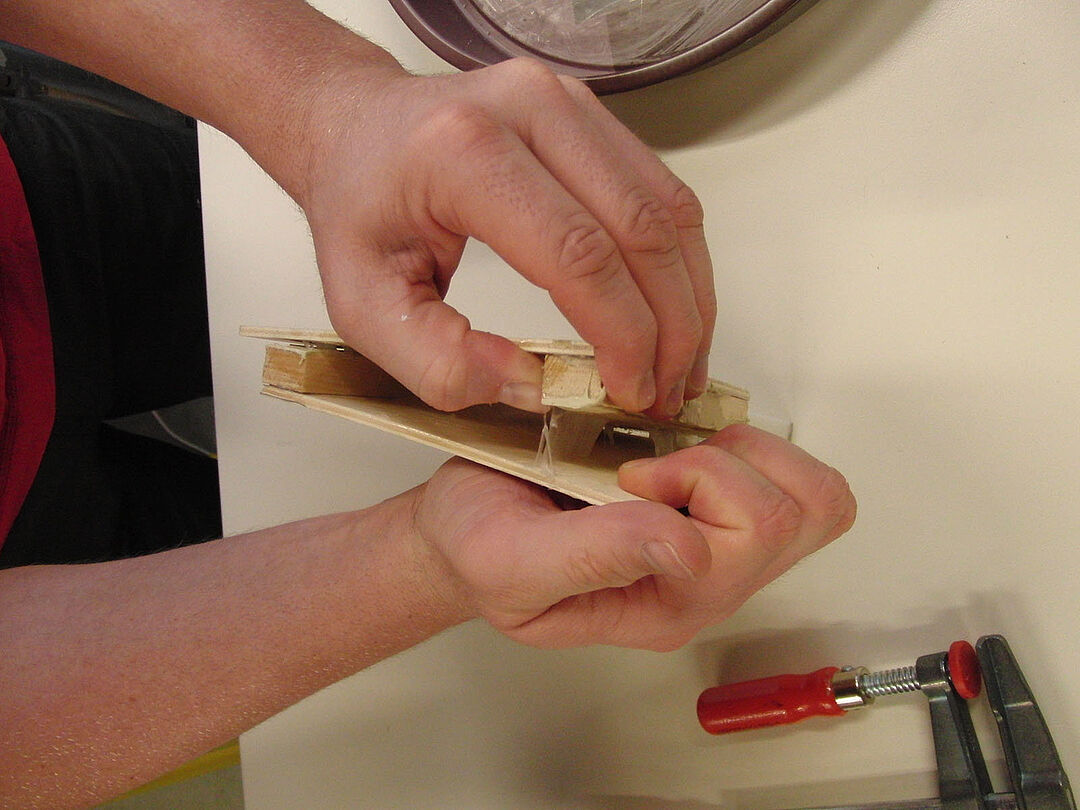
To extract the casts, disassemble into the single molds. Cut off excess silicone at the top, and on the sides. Then, gently wiggle the two mold parts loose, and finally separate them. It helps to run a cutter along the seam to loosen the silicone. Finally, clean the seam on the cast.

3 Producing PneuFlex actuators
3.1 Cast active layers
Using the silicone casting technique, create the U-shaped active layers of the actuator.
3.2 Winding the reinforcement helices
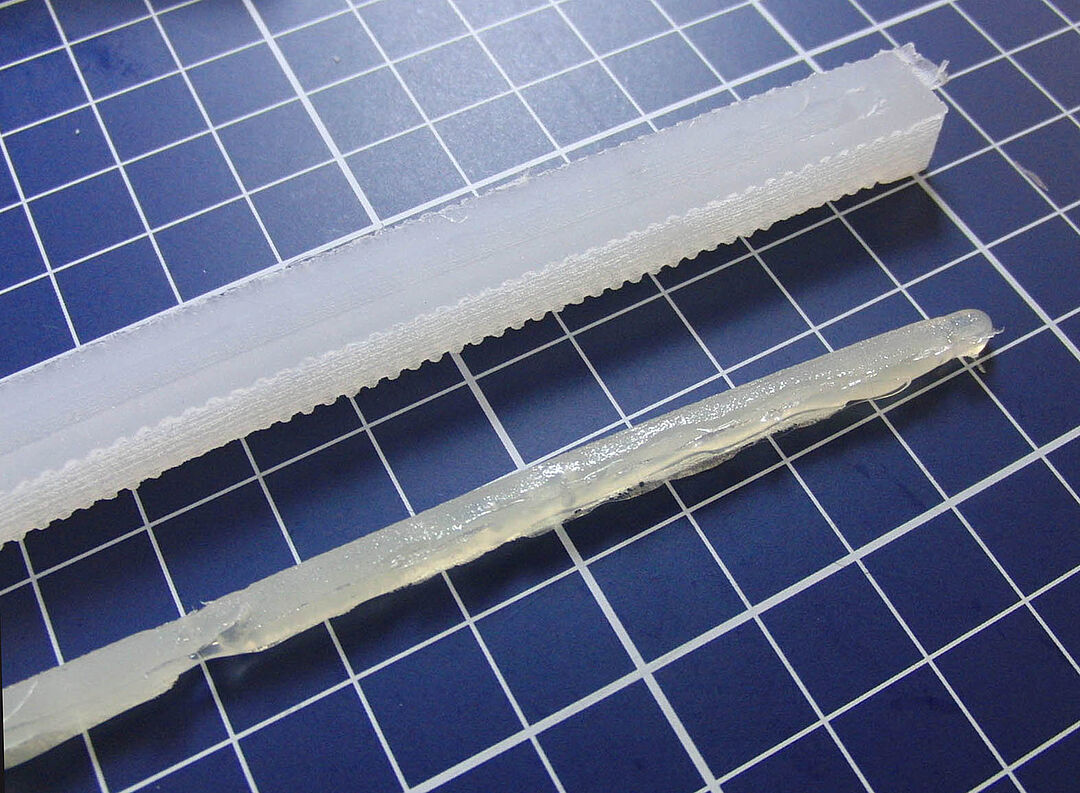
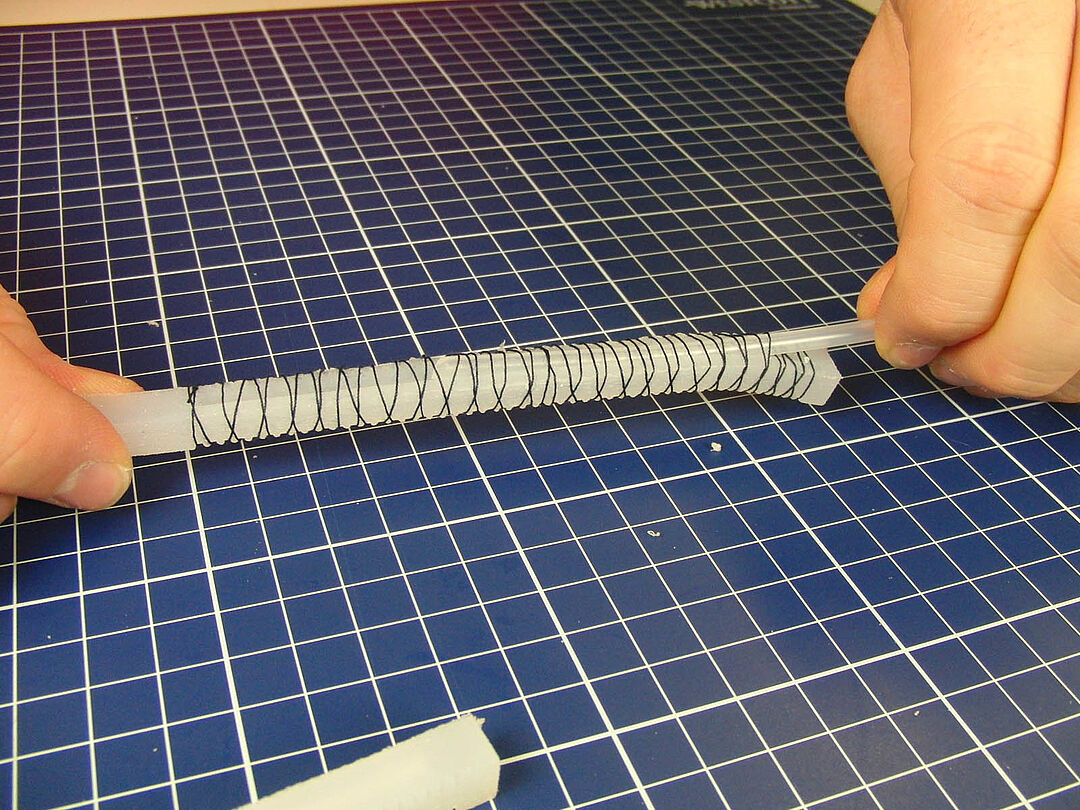
First, we need to stabilize the active layer to make it easier to handle and not to squeeze the air chamber. Take a glue gun, fill the cavity, and let it cool. Then take the piece of glue out, turn it upside down, and back into the cavity to have the smooth side face the opening. Alternatively, you can also use something else to fill the cavity, e.g. a 3mm PE tube.
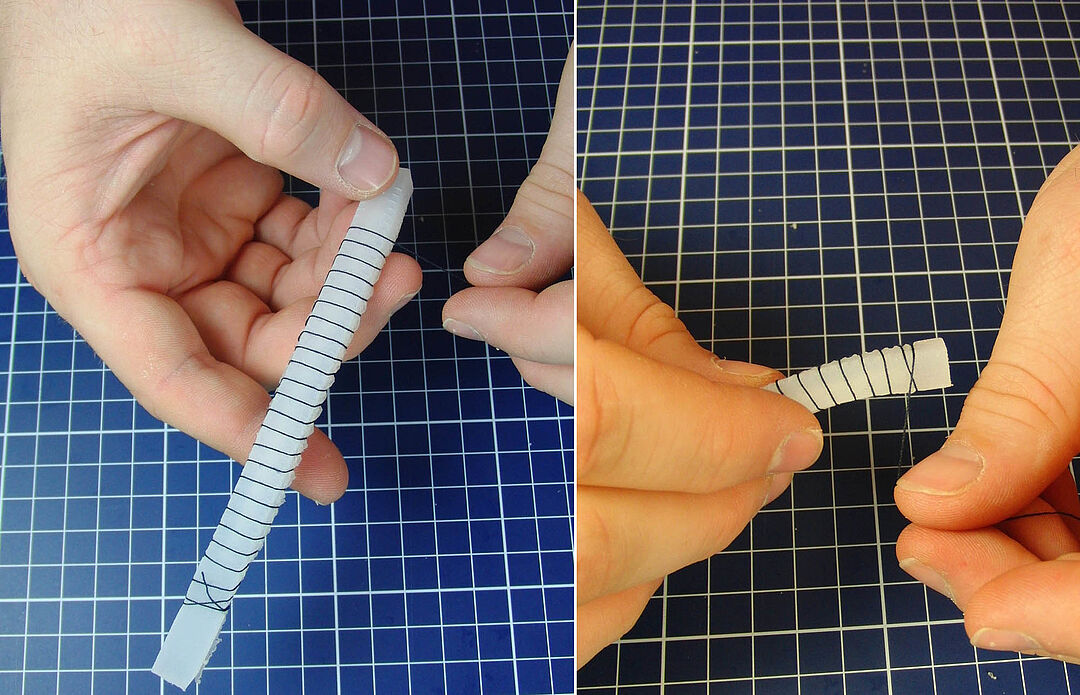
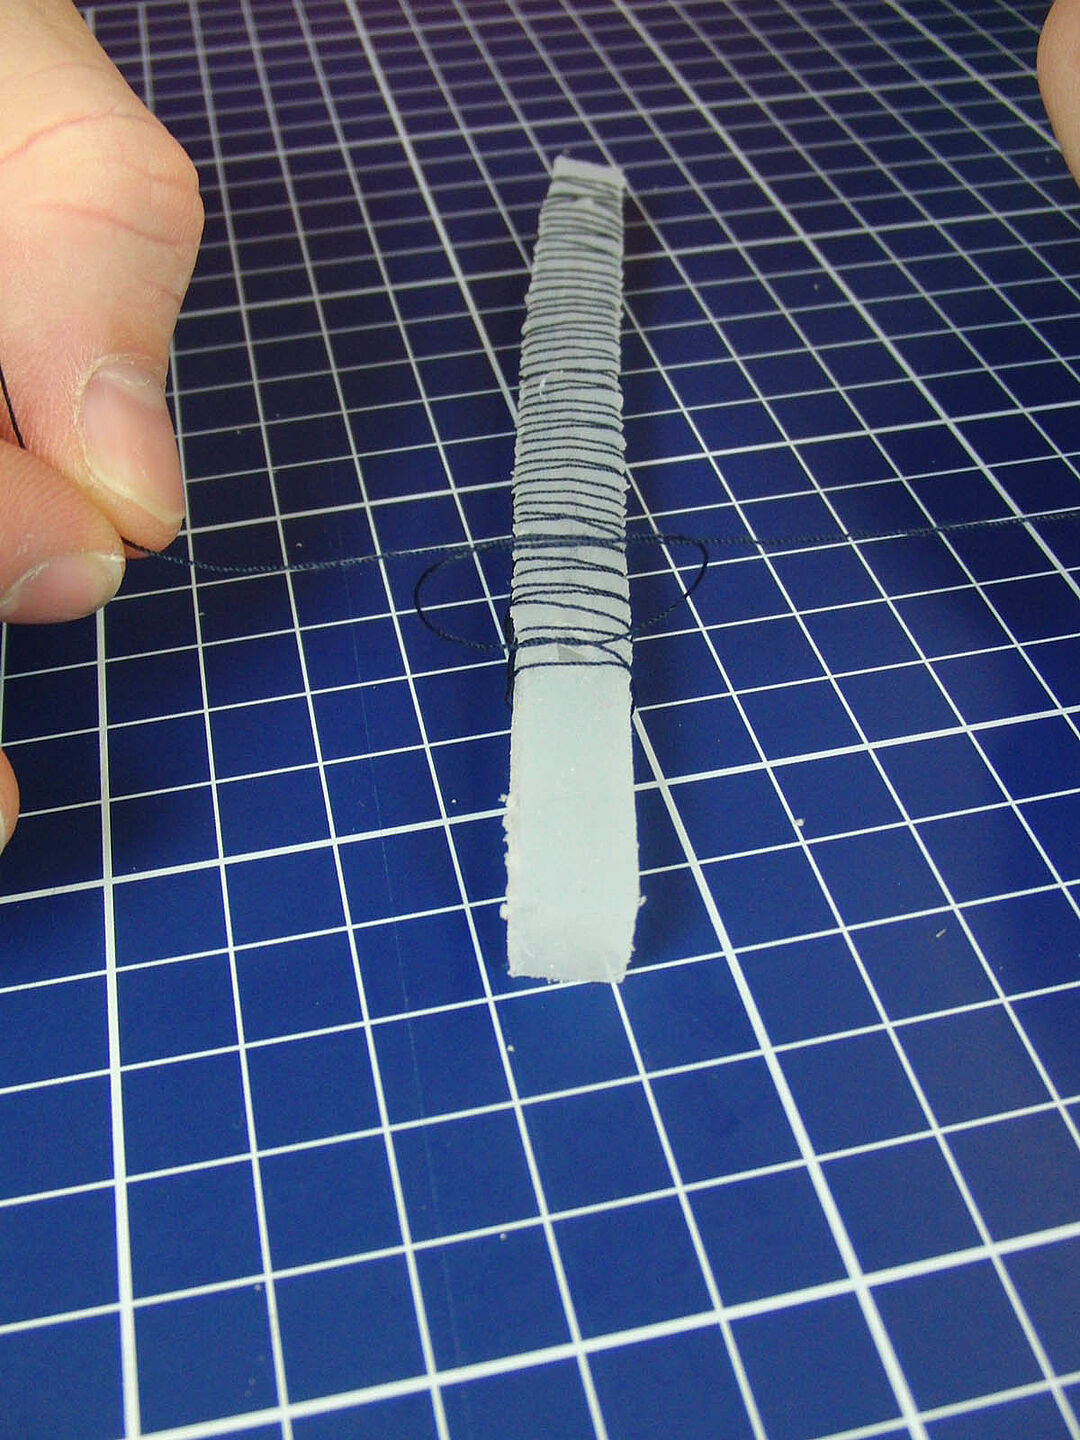
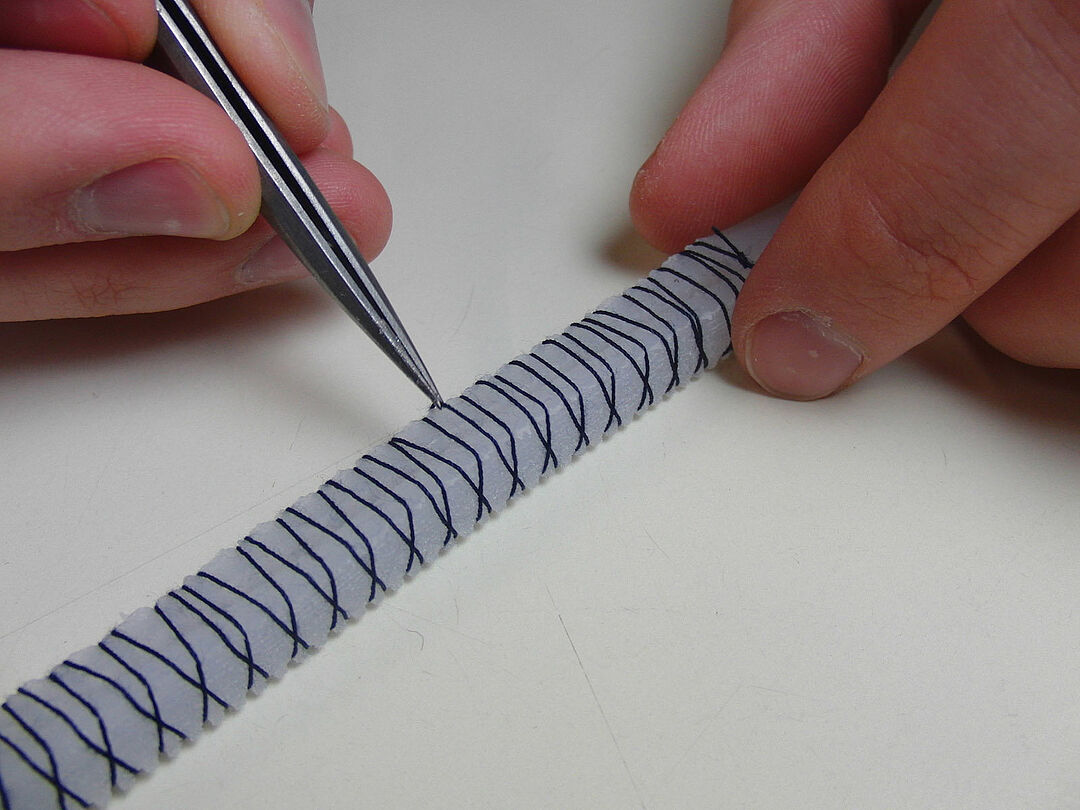
Take sewing thread (100% polyester, e.g. 50 gauge), and wind a spiral along the active layer, passing every second notch of the mold. When you reach the end, keep winding back to the beginning, filling up the remaining notches. This creates two countercyclical helices that cross each other only on the sides of the active layer. Cut off the thread and knot the two ends together. Then extract the support filling.
Probably, some turns got displaced during winding. Nudge them back to where they should be using a needle or pincers.

3.3 Cast passive layer
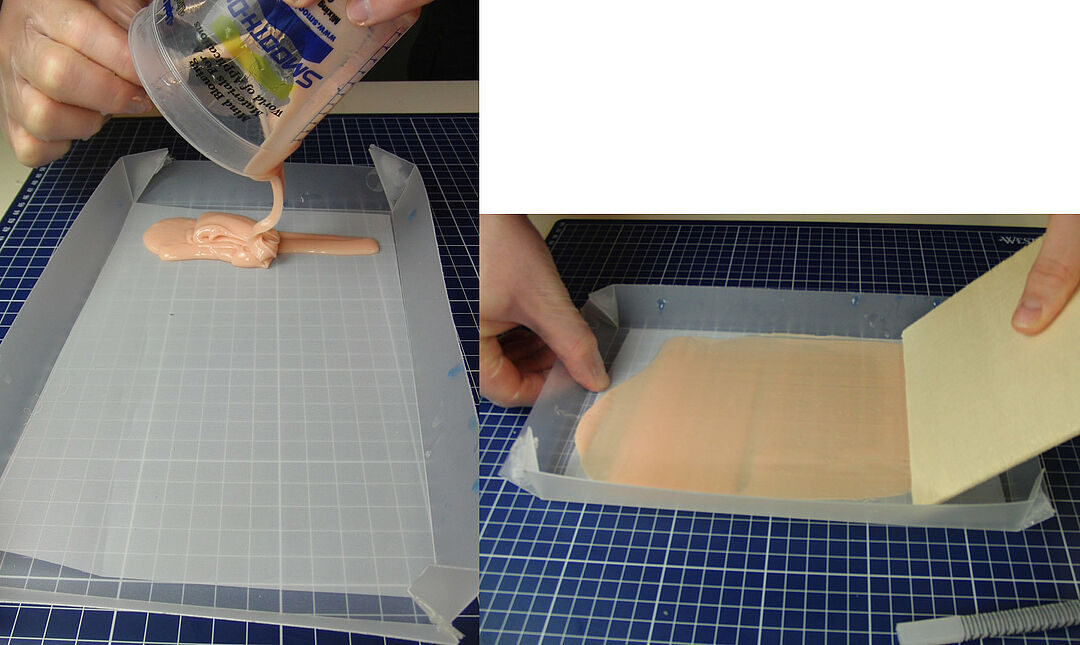
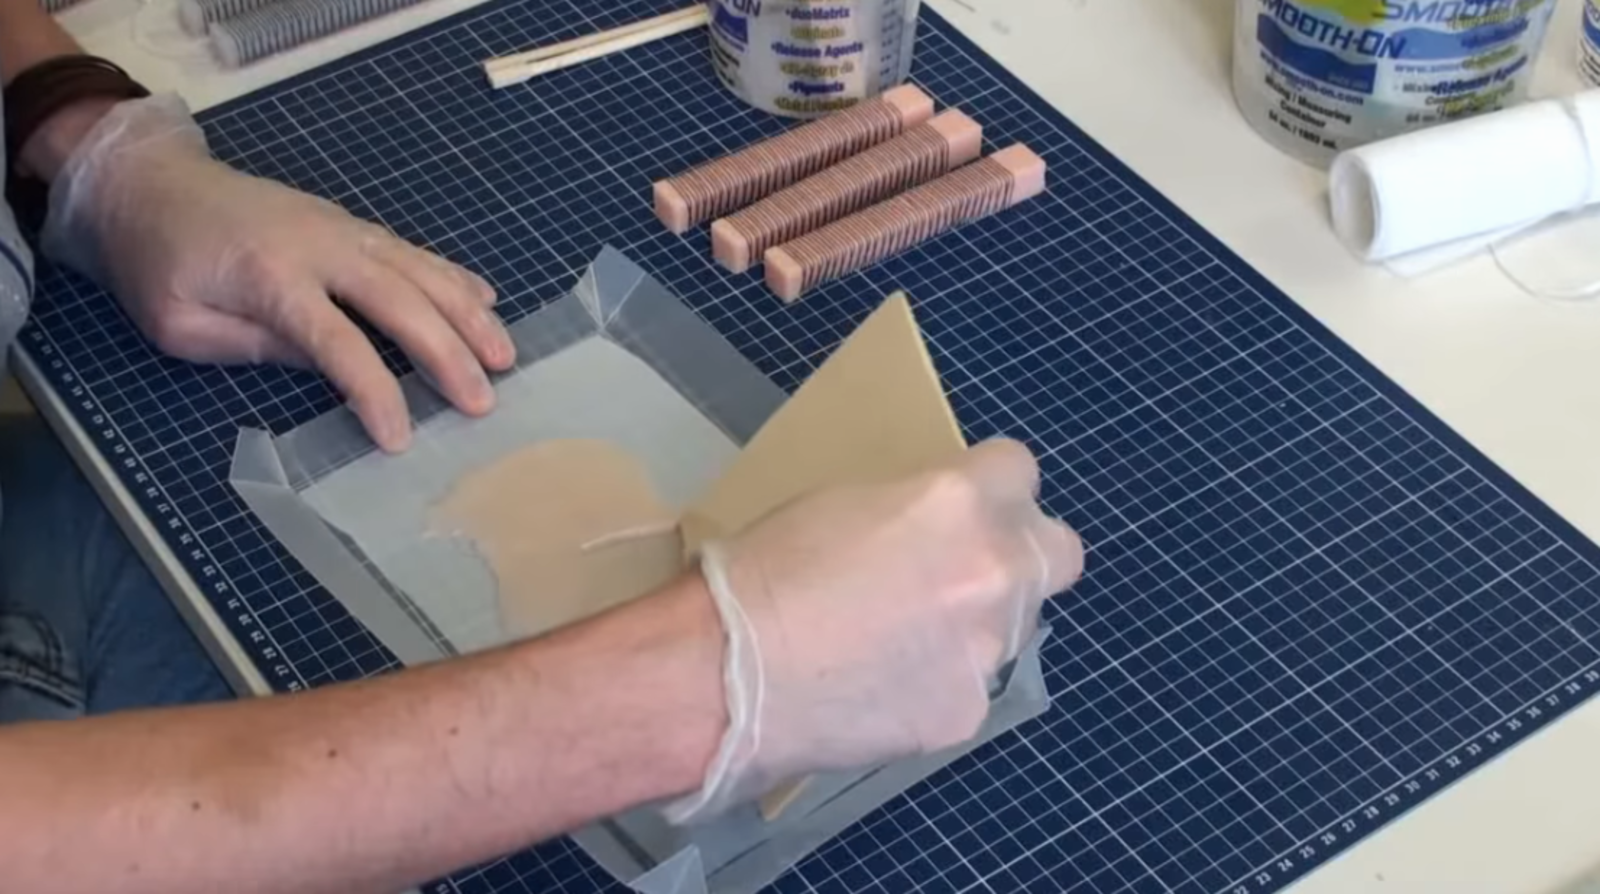
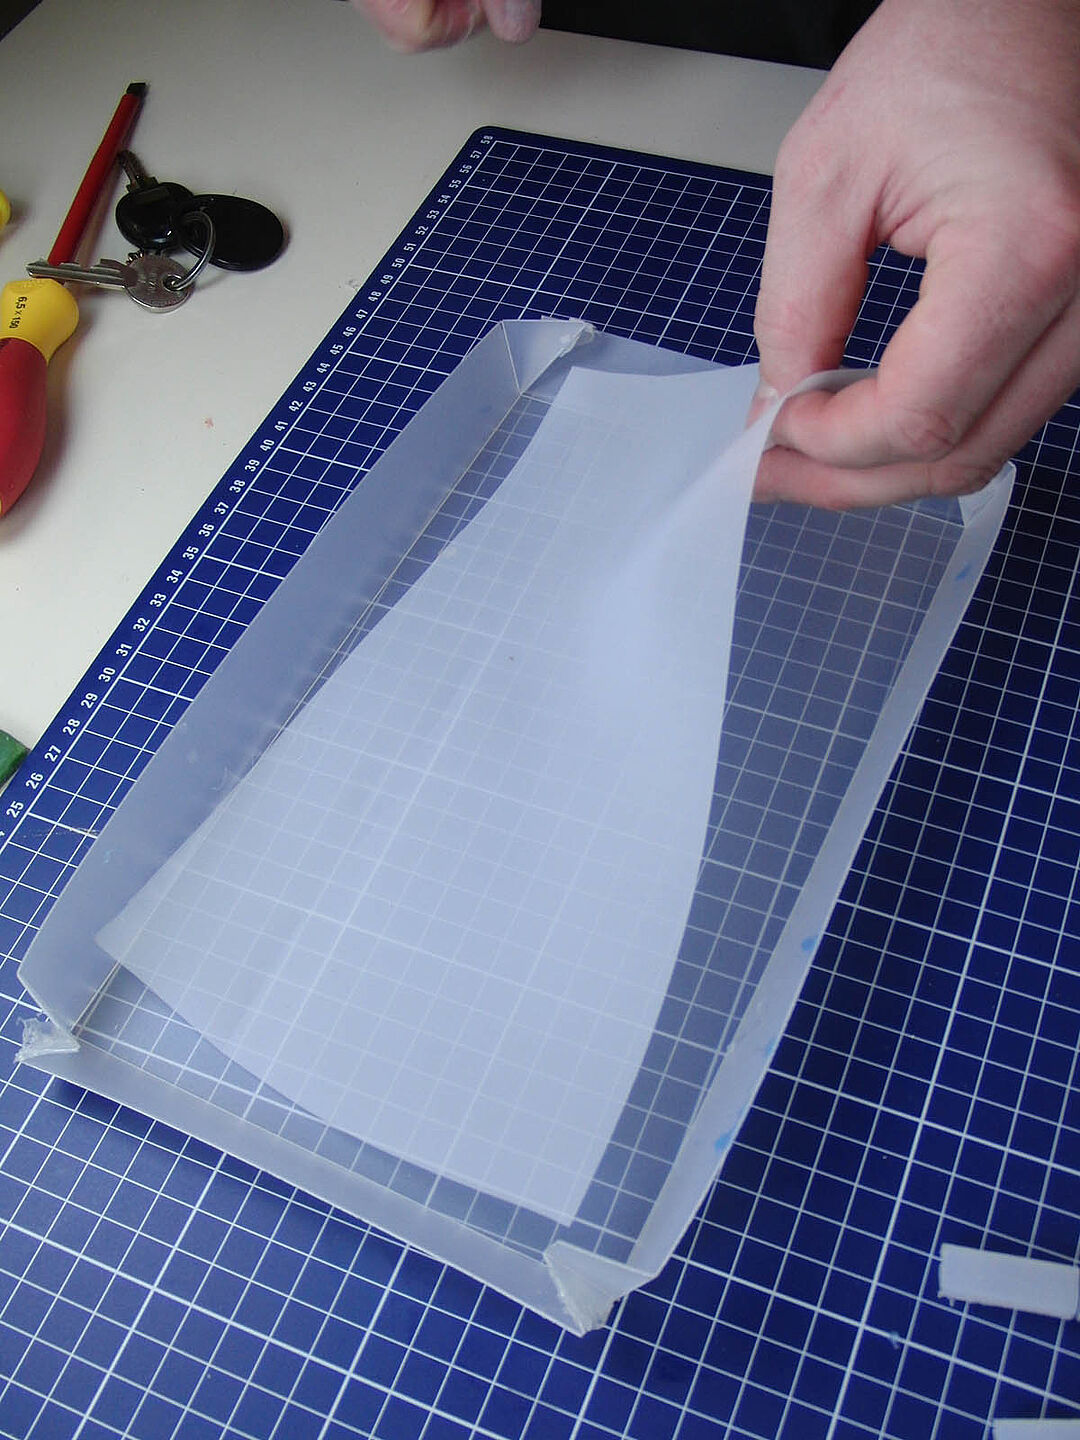
Take a sheet pan (PP/PE recommended) big enough to hold all active layers. Cut out a sheet of silkscreen slightly smaller than the pan, and place it inside. Calculate the amount of silicone for a layer 1.5mm thick (about 0.16g/cm²), mix, and pour on the pan. place the pan into the vacuum chamber and evacuate. wait until the foaming stops and no air is trapped below the silkscreen fabric.
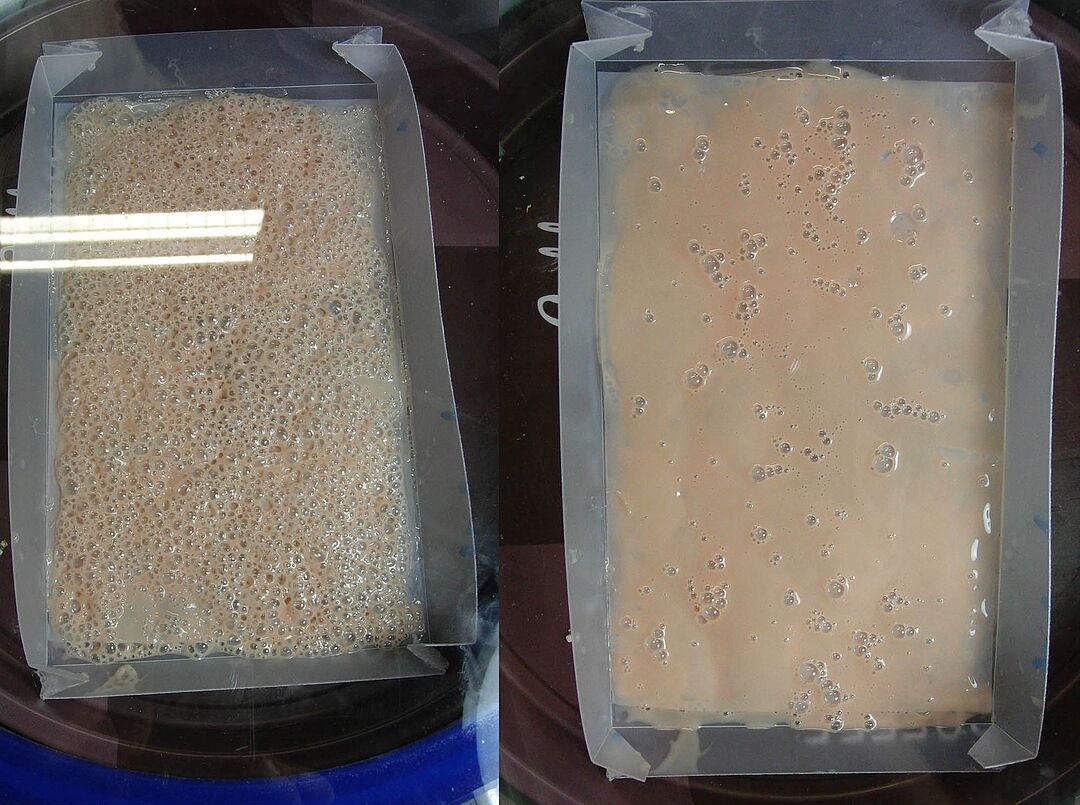
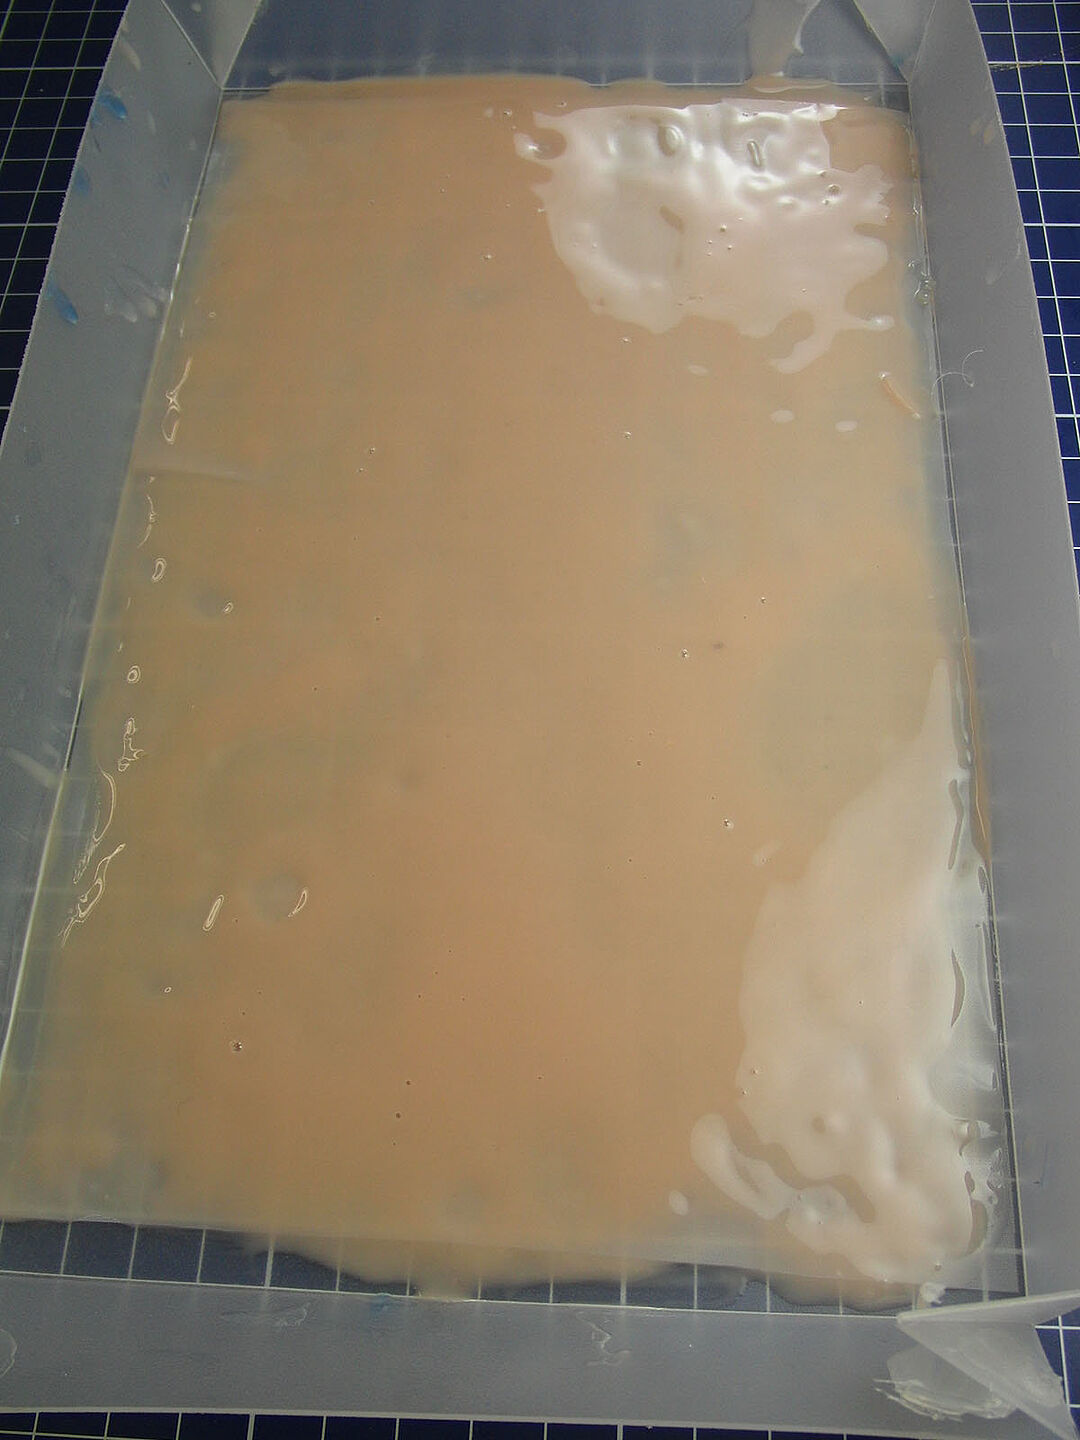

Take the pan out of the vacuum chamber and scrape off excess silicone with a spatula to yield an evenly thick layer. The spatula is spaced from the bottom with two small round-headed screws on both edges.
3.4 Combine
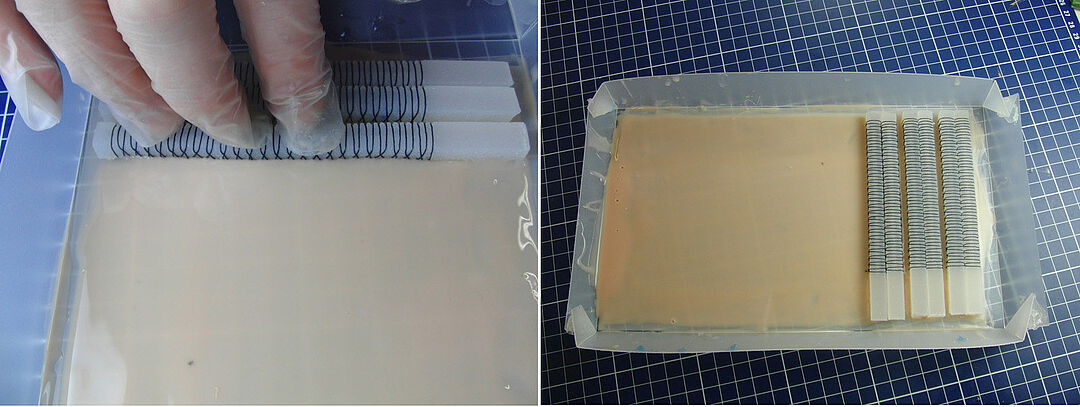
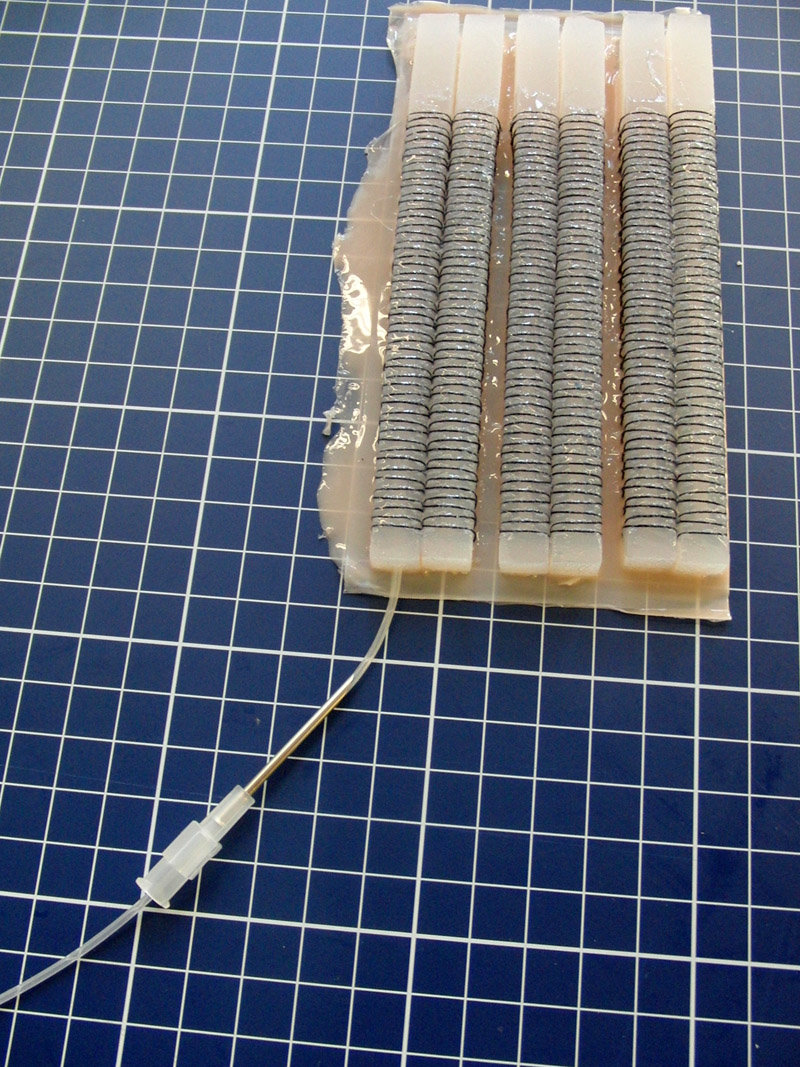
Place the active layers on the pan while the silicone is still viscous. The layers should be oriented along the direction of fibers. Several active layers can be placed next to each other to create compact arrays, or can be placed apart so they can be cut apart afterwards. Let this assembly cure.
3.5 Fixate reinforcement helix
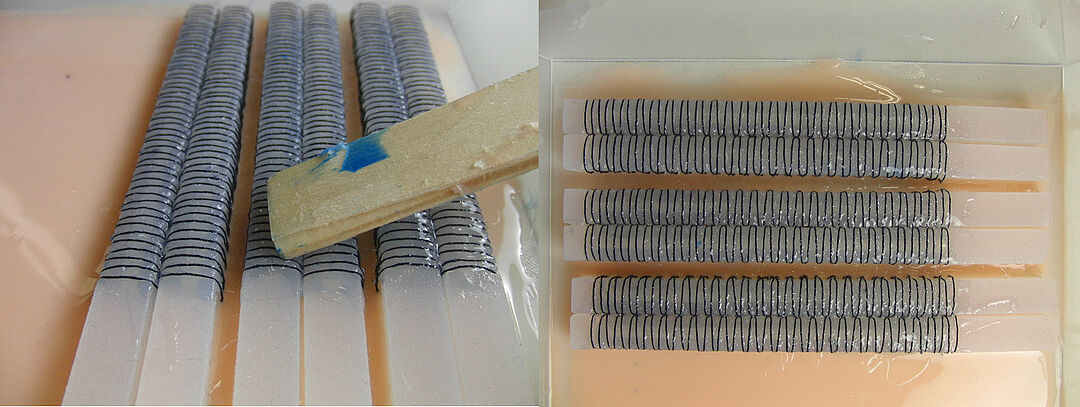
Mix a small amount of silicone (ca. 0.8g/actuator) and glue the threads of the reinforcement helix in place. One can also use one-part silicone glues that cure more rapidly. Don’t use large amounts, as this only needs to fix the thread in place when its not under tension. Again, wait until silicone is cured.
You’re now finished with assembling the actuator. Let the silicone cure according to the data sheet. Curing is a gradual process, so it takes up to a week for the silicone to develop its maximum strength.
3.6 Insert supply tubing
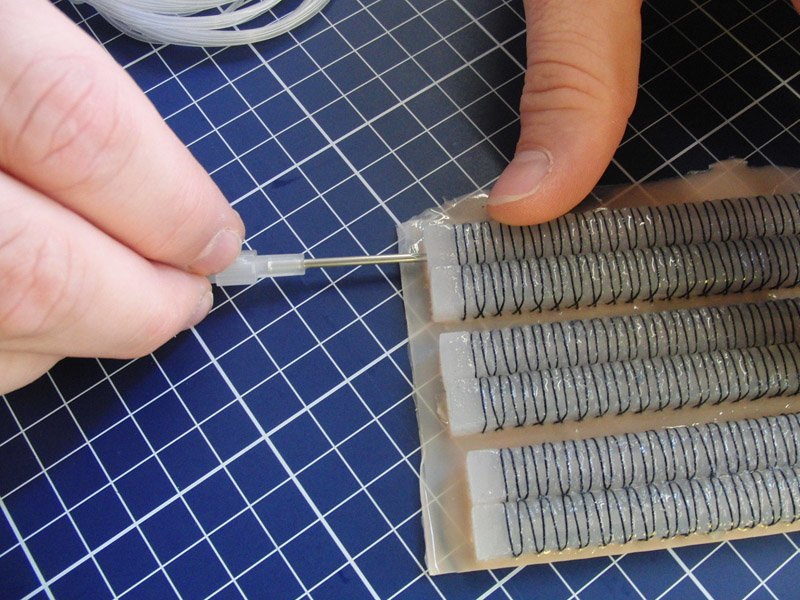
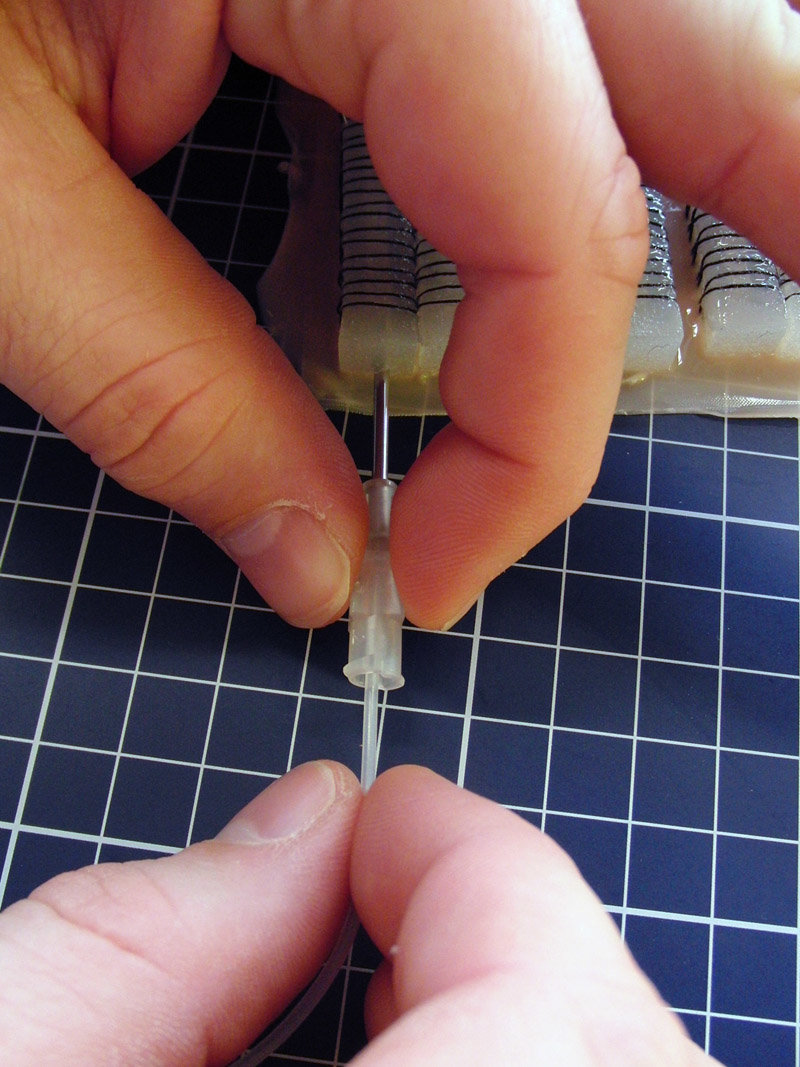
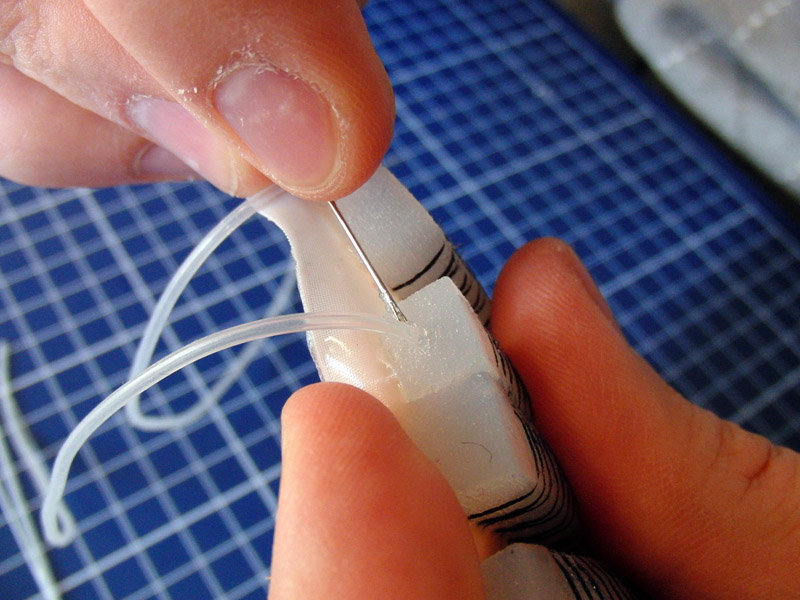
Take a cannula with 2mm inner diameter, and penetrate the rubber stick at a face with plenty of silicone (usually either end of the stick) into the air chamber. Insert a 1.5mm silicone tube through the needle and then retract the needle while pushing the rubber tube. Then take the blunt end of a needle and stuff and distribute a tiny amount of one-part silicone glue between rubber stick and rubber tube to seal it.
4 Working with PneuFlex actuators
Here are some tips that will help you to make most out of the actuators.
4.1 Connecting to industrial pneumatics
PneuFlex actuators are of no use without connecting them to an air supply. Pneumatic systems based on 4mm PE tubing are ubiquitous in industrial automation and easy to work with, so connecting to them will give you access to a plethora of off the shelf products.
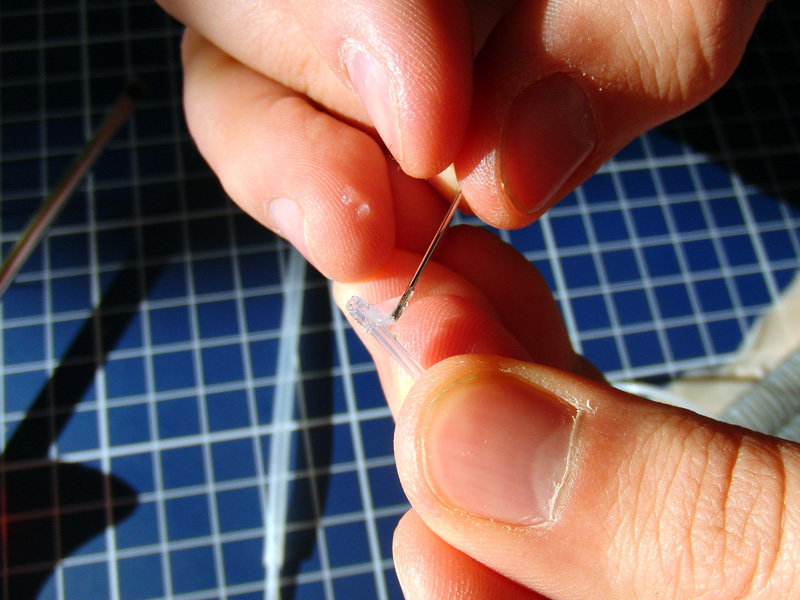
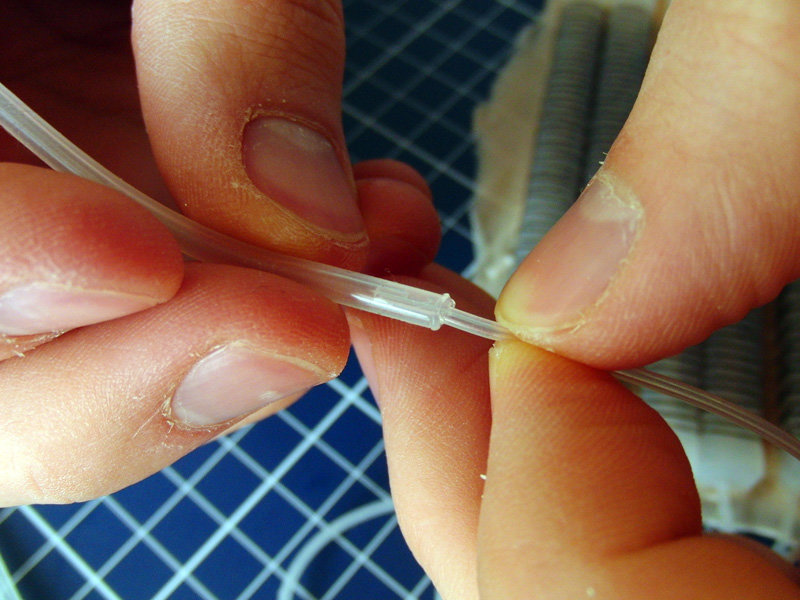
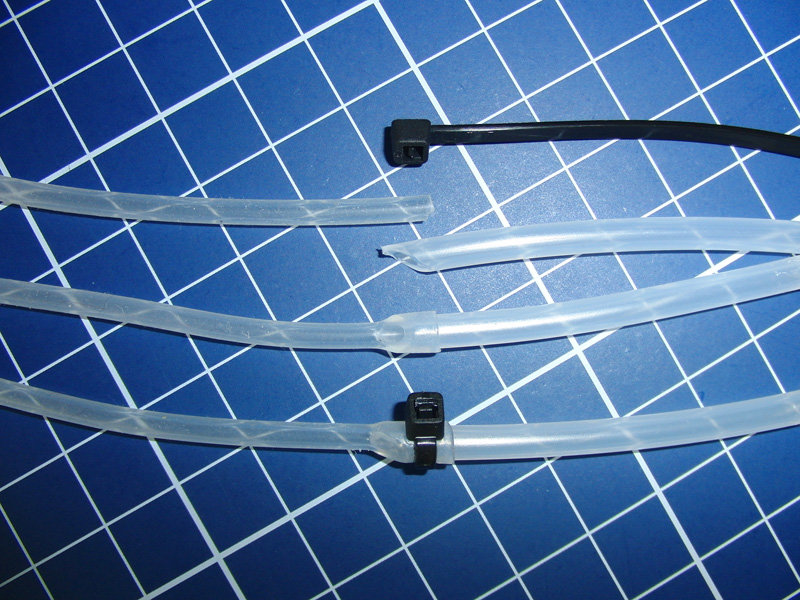
Connect your PneuFlex actuator by first gluing a piece of bigger silicone tube (2mm inner diameter) on the small one of the rubber stick (1.5mm outer diameter). Then, cut off a 4mm PE tube at a slant angle, and use the resulting nose to put the silicone tube over the PE tube. secure it in place with a small cable strap.
4.2 Controlling PneuFlex actuators
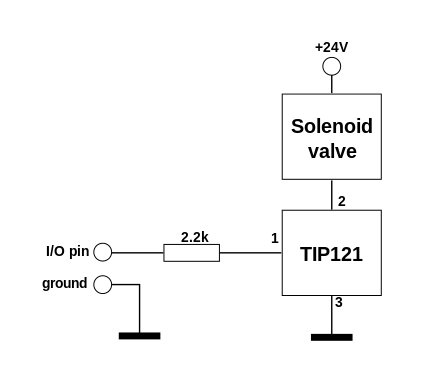
The simplest way to control the actuator is to use solenoid valves, such as from Festo (MHE2 series) or The Lee Company. Using an integrated Darlington transistor circuit (TIP121), you can control these valves with the IO ports of an Arduino, Raspberry Pi, or any other embedded system.
4.3 Fixing PneuFlex actuators
The actuators are very robust, but in case they fracture, they usually can be quickly fixed with a bit of silicone glue and a blunt wire or needle to stuff it into the fracture. Needle and thread are also valuable for adding reinforcements at problematic spots. Another technique is to use a syringe and a cannula to inject silicone at certain places, like air bubbles or holes.
Disclaimer
We provide this tutorial as is, in the hope that this technique for creating robots is adopted and developed by other researchers or hobbyists. We would like to hear of your experiences and applications, so drop us an email!
Please take care when working with chemicals. Read the Material Safety Data Sheets provided by the manufacturers and evaluate whether our instructions are compatible with your lab safety rules! We will not take responsibility for your actions.
Linking, Citing and Contact
We welcome linking to this site, and we will maintain it under the URL http://www.robotics.tu-berlin.de/index.php?id=pneuflex_tutorial. If you want to copy or reuse all or parts of this content, please contact the RBO Lab for permission.
If you want to cite our work, please use:
Raphael Deimel and Oliver Brock. A Compliant Hand Based on a Novel Pneumatic Actuator. Proceedings of the IEEE International Conference on Robotics and Automation (ICRA), pp. 2047–2053, 2013.
or
Raphael Deimel and Oliver Brock. A Novel Type of Compliant and Underactuated Robotic Hand for Dexterous Grasping. The International Journal of Robotics Research 35(1-3):161-185, 2016.
You also can find additional information on the PneuFlex designprinciples there.
For any questions or errors found, please contact: Vincent Wall
